WORKING WITH TABLES IN SMARTFORMS:
Tables are used to print the data in tabular format. Table contains three sections.
1. Header
2. Main area
3. Footer
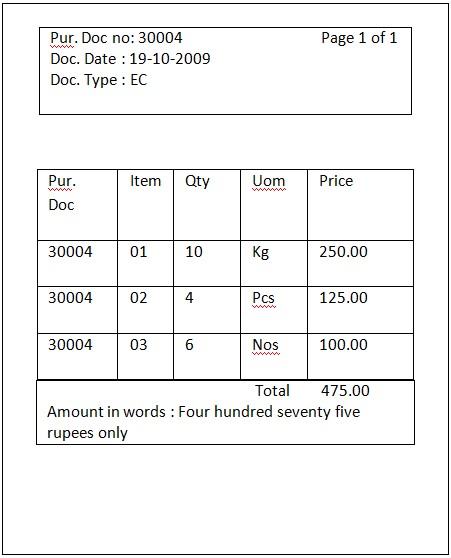
Based on the given purchasing document number, display the purchase order details as below.
1. Execute transaction 'SMARTFORMS'.
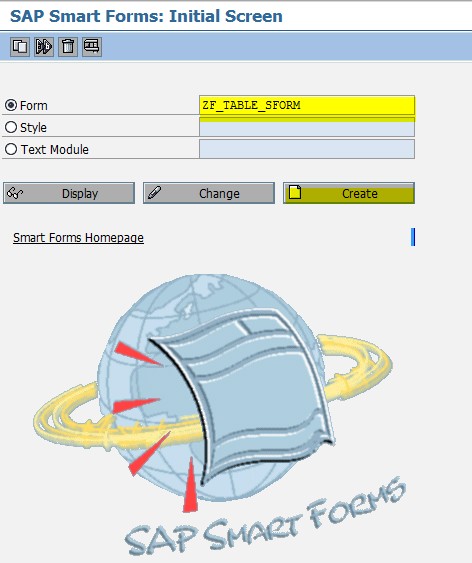
2. provide the smartform name ( Eg: ZF_TABLE_SFORM ) and click on create.
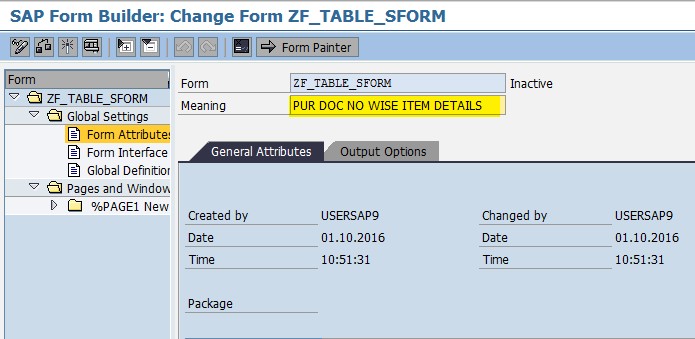
3. Provide short description and double click on 'Form Interface' in the left panel.
4. In the import tab provide the following details ( Input variable and data work area which are coming from print program. Here I created one global workarea with the following fields ).
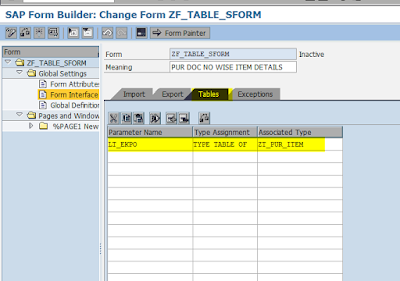
5. In the Tables tab provide the following details ( In this internal table is declared with table type ( ZT_PUR_ITEM ) why bcz whenever the internal table data is coming from print program we need one table type ( global table type ). We can use pre-defined global table type with our required fields ( Eg: /SAPSLL/EKPO_R3_T ) or customized table type with our required fields ).
6. Now double click on Global definitions tab in the left panel and provide the details as below ( This is a local work area to loop the internal table data which is coming from print program ).
7. Now click on Types tab and declare the types as follows.
8. Now click on Currency/ Quantity fields tab and provide the details as below. ( Whenever we are working with currency and quantity fields we must provide the reference fields )
9. All the declarations are completed now we are going to design the layout.
10. Expand the Pages and widows and select the page. Right click on the page. Create. Window. ( To print the header text and page numbers )
11. Provide window name ( Eg: PUR_HEADER_DATA ) and meaning ( Eg: Header data and page no ).
12. Select the header window and right click . Create . Text.
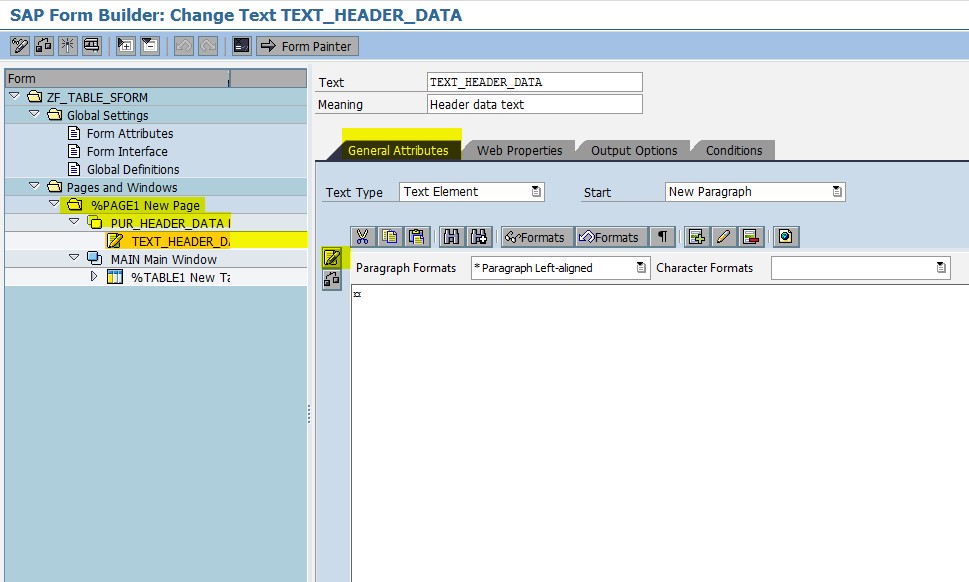
13. Provide the text name ( Eg: Text_header_data ) and meaning ( Eg: header data text ).
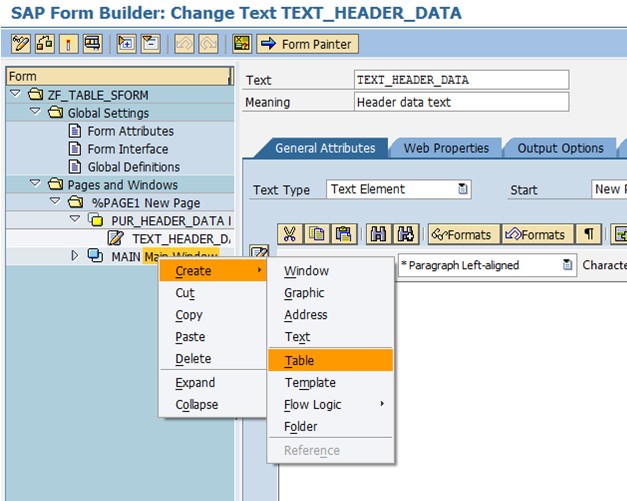
14. Now select the main window. Create. Table.
15. Now select the line type ( Eg: LTYPE1 ) right click and select the rename line ( Eg: LINE1 ).
16. Select the line ( Eg: LINE1 ). Right click. Select insert. Select Empty line underneath to create a new line and rename the line as ( Eg: LINE2 ).
17. Now the window is as below.
18. Select the LINE1 and click on Details button to divide the line.
19. Here LINE1 is used for Main window ( Header and Main area bcz these two are similar in structure ) and LINE2 is used for Main window ( Footer ).
20. Click on Table painter. Now the lines structure becomes like this.
21. Now double click on Main window header. Right click. Create. Select Table line.
22. Select line type as LINE1 and window becomes like this.
23. Follow steps 21 and 22 for Main window main area to select line type as LINE1 and for footer select line type as LINE2.
24. Now the screen is as below.
25. Now select the each cell. Right click. Create. Text. ( To print the data in the window ). Name them according to field text and field value to understand who will going to work on this smartform.
26. After creating the texts the screen becomes like this.
27. Now double click on Table and click on data tab and provide the details as follows.
27. Now in the right hand set layout according to your design by drag and drop. If it is not visible Click on form painter in the application tool bar and adjust the layout design as below.
28. Save, Check and Activate the program.
Develop the print program
*&---------------------------------------------------------------------*
*& Report ZP_PUR_PRINT_PROGRAM
*&
*&---------------------------------------------------------------------*
*&
*&
*&---------------------------------------------------------------------*
REPORT zp_pur_print_program.
PARAMETERS : p_ebeln TYPE ekko-ebeln.
DATA fm TYPE rs38l_fnam.
*work area for header data
DATA BEGIN OF LS_EKKO.
INCLUDE STRUCTURE ZST_PUR_HEA.
DATA END OF LS_EKKO.
*work area and internal table for item data
data begin of ls_ekpo.
include STRUCTURE ztpuritem.
data end of ls_ekpo.
data lt_ekpo like table of ls_ekpo.
*Fetching header and item data.
SELECT SINGLE ebeln
bsart
aedat
FROM ekko
INTO ls_ekko
WHERE ebeln = p_ebeln.
if ls_ekko is not initial.
SELECT ebeln
ebelp
menge
meins
netpr
FROM ekpo
INTO TABLE lt_ekpo
WHERE ebeln = ls_ekko-ebeln.
endif.
*Calling the smartform
CALL FUNCTION 'SSF_FUNCTION_MODULE_NAME'
EXPORTING
formname = 'ZF_TABLE_SFORM'
* VARIANT = ' '
* DIRECT_CALL = ' '
IMPORTING
FM_NAME = FM* EXCEPTIONS
* NO_FORM = 1
* NO_FUNCTION_MODULE = 2
* OTHERS = 3
.
IF sy-subrc <> 0.
* Implement suitable error handling here
ENDIF.
*Exporting data to smartforam
CALL FUNCTION FM
EXPORTING
* ARCHIVE_INDEX =
* ARCHIVE_INDEX_TAB =
* ARCHIVE_PARAMETERS =
* CONTROL_PARAMETERS =
* MAIL_APPL_OBJ =
* MAIL_RECIPIENT =
* MAIL_SENDER =
* OUTPUT_OPTIONS =
* USER_SETTINGS = 'X'
i_ebeln = P_EBELN
ls_ekko = LS_EKKO* IMPORTING
* DOCUMENT_OUTPUT_INFO =
* JOB_OUTPUT_INFO =
* JOB_OUTPUT_OPTIONS =
TABLES
lt_ekpo = LT_EKPO* EXCEPTIONS
* FORMATTING_ERROR = 1
* INTERNAL_ERROR = 2
* SEND_ERROR = 3
* USER_CANCELED = 4
* OTHERS = 5
.
IF sy-subrc <> 0.
* Implement suitable error handling here
ENDIF.
Now execute the print program
Provide input.
Provide output device ( Eg: LP01 ) and click on print preview.
It will display the empty layout why bcz we are not written code in the smartform to print.
Now go to smartform and write the code in the text editor to print the data.
1. Open the smartform in change mode.
2. Expand the page. Expand header window and double click on text.
Tables are used to print the data in tabular format. Table contains three sections.
1. Header
2. Main area
3. Footer
Based on the given purchasing document number, display the purchase order details as below.

1. Execute transaction 'SMARTFORMS'.
2. provide the smartform name ( Eg: ZF_TABLE_SFORM ) and click on create.

5. In the Tables tab provide the following details ( In this internal table is declared with table type ( ZT_PUR_ITEM ) why bcz whenever the internal table data is coming from print program we need one table type ( global table type ). We can use pre-defined global table type with our required fields ( Eg: /SAPSLL/EKPO_R3_T ) or customized table type with our required fields ).

6. Now double click on Global definitions tab in the left panel and provide the details as below ( This is a local work area to loop the internal table data which is coming from print program ).
7. Now click on Types tab and declare the types as follows.
8. Now click on Currency/ Quantity fields tab and provide the details as below. ( Whenever we are working with currency and quantity fields we must provide the reference fields )
9. All the declarations are completed now we are going to design the layout.
10. Expand the Pages and widows and select the page. Right click on the page. Create. Window. ( To print the header text and page numbers )
11. Provide window name ( Eg: PUR_HEADER_DATA ) and meaning ( Eg: Header data and page no ).
12. Select the header window and right click . Create . Text.
13. Provide the text name ( Eg: Text_header_data ) and meaning ( Eg: header data text ).
14. Now select the main window. Create. Table.
15. Now select the line type ( Eg: LTYPE1 ) right click and select the rename line ( Eg: LINE1 ).
16. Select the line ( Eg: LINE1 ). Right click. Select insert. Select Empty line underneath to create a new line and rename the line as ( Eg: LINE2 ).
17. Now the window is as below.
18. Select the LINE1 and click on Details button to divide the line.
19. Here LINE1 is used for Main window ( Header and Main area bcz these two are similar in structure ) and LINE2 is used for Main window ( Footer ).
20. Click on Table painter. Now the lines structure becomes like this.
21. Now double click on Main window header. Right click. Create. Select Table line.
22. Select line type as LINE1 and window becomes like this.
23. Follow steps 21 and 22 for Main window main area to select line type as LINE1 and for footer select line type as LINE2.
24. Now the screen is as below.
25. Now select the each cell. Right click. Create. Text. ( To print the data in the window ). Name them according to field text and field value to understand who will going to work on this smartform.
26. After creating the texts the screen becomes like this.
27. Now double click on Table and click on data tab and provide the details as follows.
27. Now in the right hand set layout according to your design by drag and drop. If it is not visible Click on form painter in the application tool bar and adjust the layout design as below.
28. Save, Check and Activate the program.
Develop the print program
*&---------------------------------------------------------------------*
*& Report ZP_PUR_PRINT_PROGRAM
*&
*&---------------------------------------------------------------------*
*&
*&
*&---------------------------------------------------------------------*
REPORT zp_pur_print_program.
PARAMETERS : p_ebeln TYPE ekko-ebeln.
DATA fm TYPE rs38l_fnam.
*work area for header data
DATA BEGIN OF LS_EKKO.
INCLUDE STRUCTURE ZST_PUR_HEA.
DATA END OF LS_EKKO.
*work area and internal table for item data
data begin of ls_ekpo.
include STRUCTURE ztpuritem.
data end of ls_ekpo.
data lt_ekpo like table of ls_ekpo.
*Fetching header and item data.
SELECT SINGLE ebeln
bsart
aedat
FROM ekko
INTO ls_ekko
WHERE ebeln = p_ebeln.
if ls_ekko is not initial.
SELECT ebeln
ebelp
menge
meins
netpr
FROM ekpo
INTO TABLE lt_ekpo
WHERE ebeln = ls_ekko-ebeln.
endif.
*Calling the smartform
CALL FUNCTION 'SSF_FUNCTION_MODULE_NAME'
EXPORTING
formname = 'ZF_TABLE_SFORM'
* VARIANT = ' '
* DIRECT_CALL = ' '
IMPORTING
FM_NAME = FM* EXCEPTIONS
* NO_FORM = 1
* NO_FUNCTION_MODULE = 2
* OTHERS = 3
.
IF sy-subrc <> 0.
* Implement suitable error handling here
ENDIF.
*Exporting data to smartforam
CALL FUNCTION FM
EXPORTING
* ARCHIVE_INDEX =
* ARCHIVE_INDEX_TAB =
* ARCHIVE_PARAMETERS =
* CONTROL_PARAMETERS =
* MAIL_APPL_OBJ =
* MAIL_RECIPIENT =
* MAIL_SENDER =
* OUTPUT_OPTIONS =
* USER_SETTINGS = 'X'
i_ebeln = P_EBELN
ls_ekko = LS_EKKO* IMPORTING
* DOCUMENT_OUTPUT_INFO =
* JOB_OUTPUT_INFO =
* JOB_OUTPUT_OPTIONS =
TABLES
lt_ekpo = LT_EKPO* EXCEPTIONS
* FORMATTING_ERROR = 1
* INTERNAL_ERROR = 2
* SEND_ERROR = 3
* USER_CANCELED = 4
* OTHERS = 5
.
IF sy-subrc <> 0.
* Implement suitable error handling here
ENDIF.
Now execute the print program
Provide input.
Provide output device ( Eg: LP01 ) and click on print preview.
It will display the empty layout why bcz we are not written code in the smartform to print.
Now go to smartform and write the code in the text editor to print the data.
1. Open the smartform in change mode.
2. Expand the page. Expand header window and double click on text.


